Create a first release and image of your project
This document describes how the AICoE CI and Thoth pipelines can be used to create the images for this project. For the purpose of this tutorial, we have created the required images of the upstream repo. No action is required. If you want to build these resources from your own fork, use the following instructions for image builds.
Set up AICoE CI
You will first need to configure your repo to use AICoE CI and Thoth. The AICoE-CI tooling can be set up in just a few steps. Start by installing the AICoE CI GitHub application by following this link. When installing this application, select your profile for the organization, and specify the elyra-aidevsecops-tutorial as the repository.
Set up Thoth bots
Adding Thoth’s bots takes just a few steps! Start by installing the Kebechet GitHub application, called Khebut by following this link. It can be configured on an organization or on a single repository.
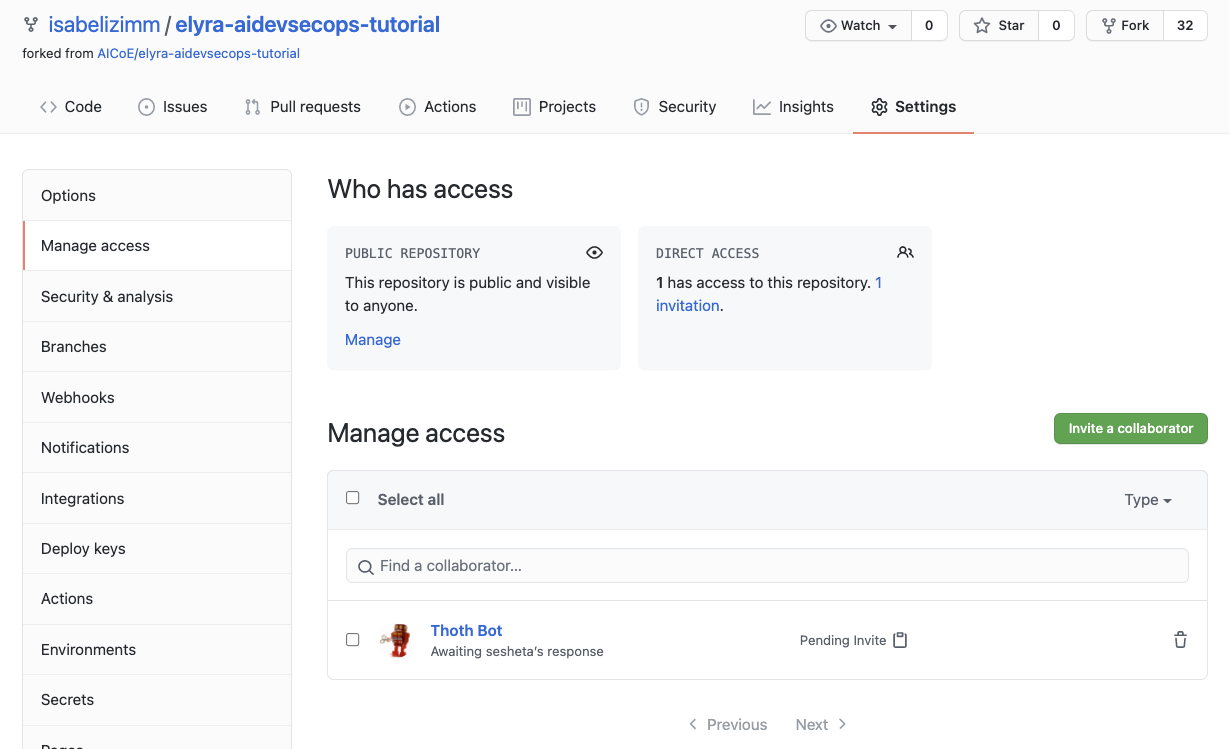
Once the application is installed, you will need to add Thoth’s bot (Sesheta) as collaborator. Navigate to your fork of elyra-aidevsecops-tutorial. Under the repository’s Settings, go to Manage Access and click on “Invite a collaborator” and add Thoth Bot Sesheta. Sesheta is a friendly Thoth bot who is used to help automate tasks. Follow this link and fill out the form to have Sesheta accept your invitation. Please note: there is sometimes a delay in Sesheta’s invite acceptance.
Thoth services require a configuration file (.thoth.yaml) at the root level of the project. In this tutorial, the file is already present, so you will not need to add it. To configure this on your own fork, you will need to update the managers section to include your GitHub username and push changes to your fork. Check push changes section for more details.
An example snippet of .thoth.yaml highlightling the changes to be made is shown below.
managers:
  - name: pipfile-requirements
  - name: update
    configuration:
      labels: [bot]
  - name: info
  - name: version
    configuration:
      maintainers:
        - goern   # UPDATE TO HAVE YOUR OWN USERNAME
        - fridex
      assignees:
        - sesheta
      labels: [bot]
      changelog_file: true
To learn more about Thoth bots and services, please check out the guide here.
Enable issues on your fork
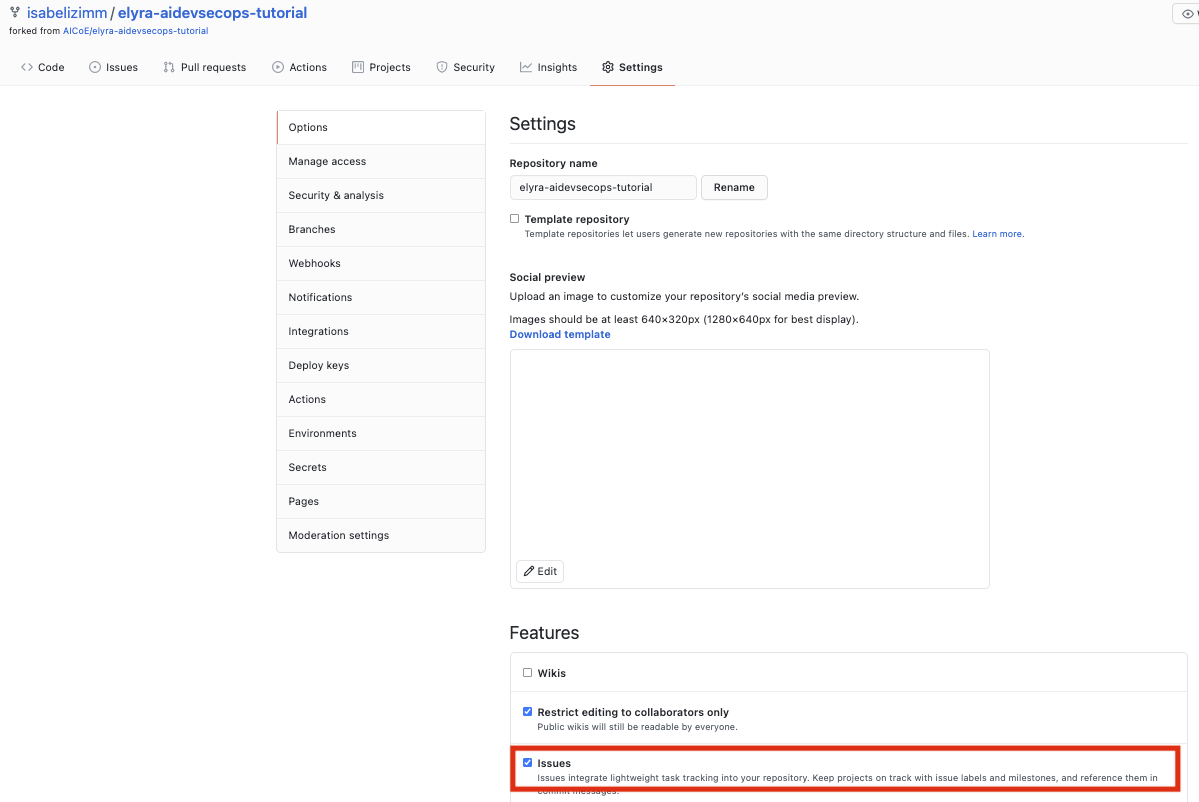
Sesheta, the bot that will assist you in this tutorial, communicates through issues. On your fork, the issues tab may not be enabled automatically. In order to enable issues, go to the Settings tab and check the box next to “Issues”.
Set up robot account in Quay
The next step involves setting up a robot account on the image registry Quay.io and requires the user to have a Quay account.
First, you will need to create a robot in the organization or individual account. Under Account Settings on Quay, click on Robot Accounts tab, and “Create Robot Account” button. Enter a name for the account. The username will become namespace+accountname where namespace is the name of the user or organization.
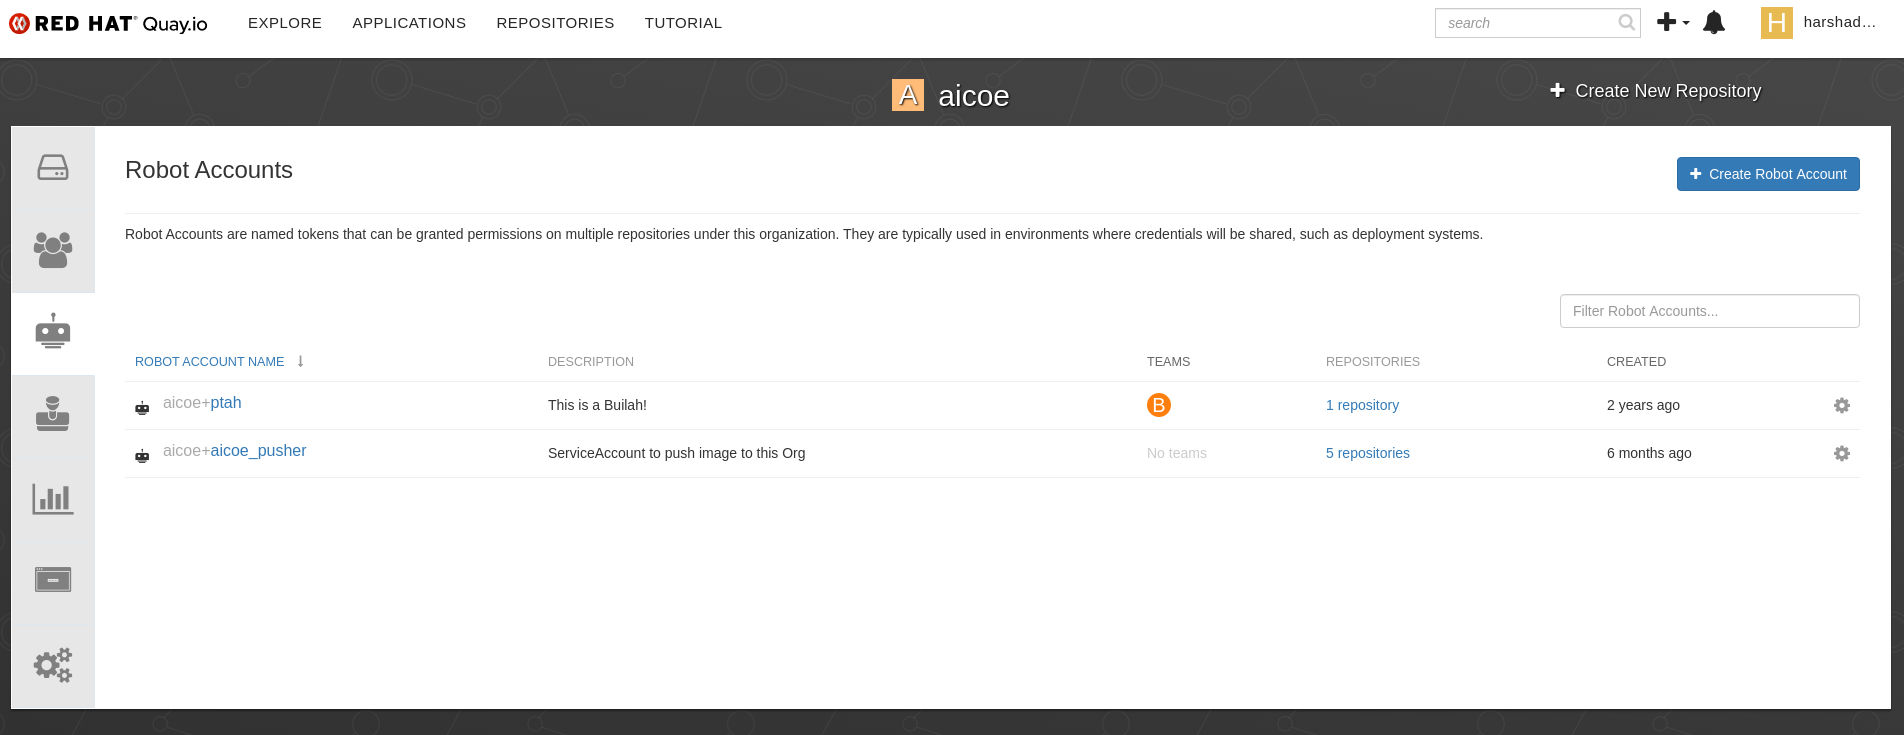
Once created, click on the robot account name. Find the “Docker Configuration” tab in the robot account popup, and copy the .json. Currently, you will have to pass it on by contacting us. You can reach us at aicoe-thoth+devconf@redhat.com. Once the secret is passed, it is ready to be used in the .aicoe-ci.yaml file in the next step.
Edit up .aicoe-ci.yaml
The last step is to add the aicoe-ci configuration file. Configuration files allows user assign details about the build requirements and specify base image and registry details for build and push. For the purpose of this tutorial, the .aicoe-ci.yaml file is already present. However, you may need to edit some of the fields for your personal access, namely registry-org, registry-project, and registry-secret.
build:
  build-stratergy: Dockerfile # Allowed values: Source, Dockerfile, Containerfile
  base-image: registry.access.redhat.com/ubi8/ubi:latest
  dockerfile-path: Dockerfile
  registry: quay.io # Image registry to be used. (default: quay.io)
  registry-org: thoth-station # Organization in Image Registry. (default: thoth-station)
  registry-project: example # project repository in Image Registry (ie, Quay) used to push image.
  registry-secret: thoth-station-thoth-pusher-secret # comes from robot account
For more detailed information on the config file and robot accounts, visit the AICoE CI documentation. Once you modify the .aicoe-ci.yaml push the changes to your repo. Check push changes section for more details.
Ask for new release
Some of the pipelines used in the Thoth project are maintained by bots. Therefore you can simply open an issue asking for a release from the repo you maintain (e.g patch, minor, major) and the bots will handle your request. Once the request is completed, the bot will also automatically close the issue, as you can see from the images below:
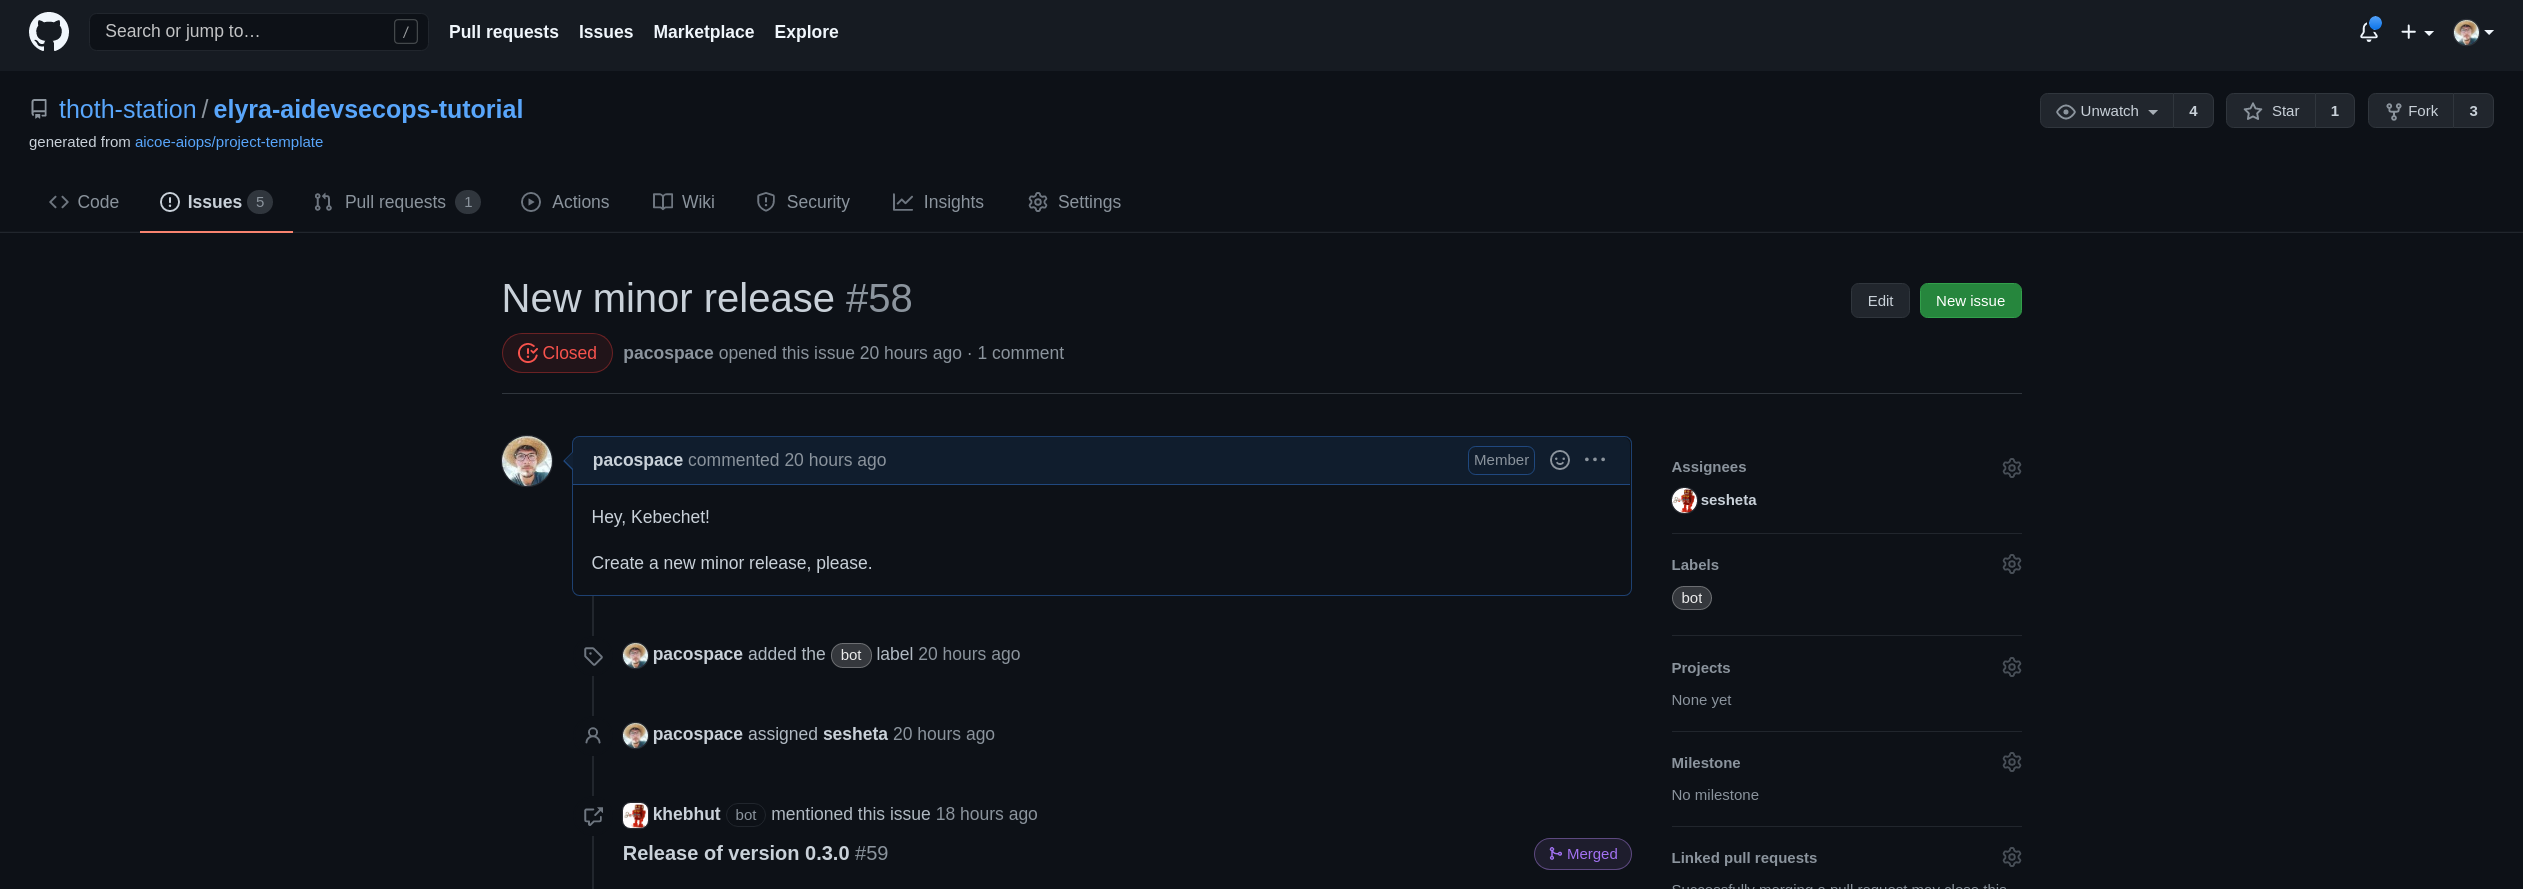
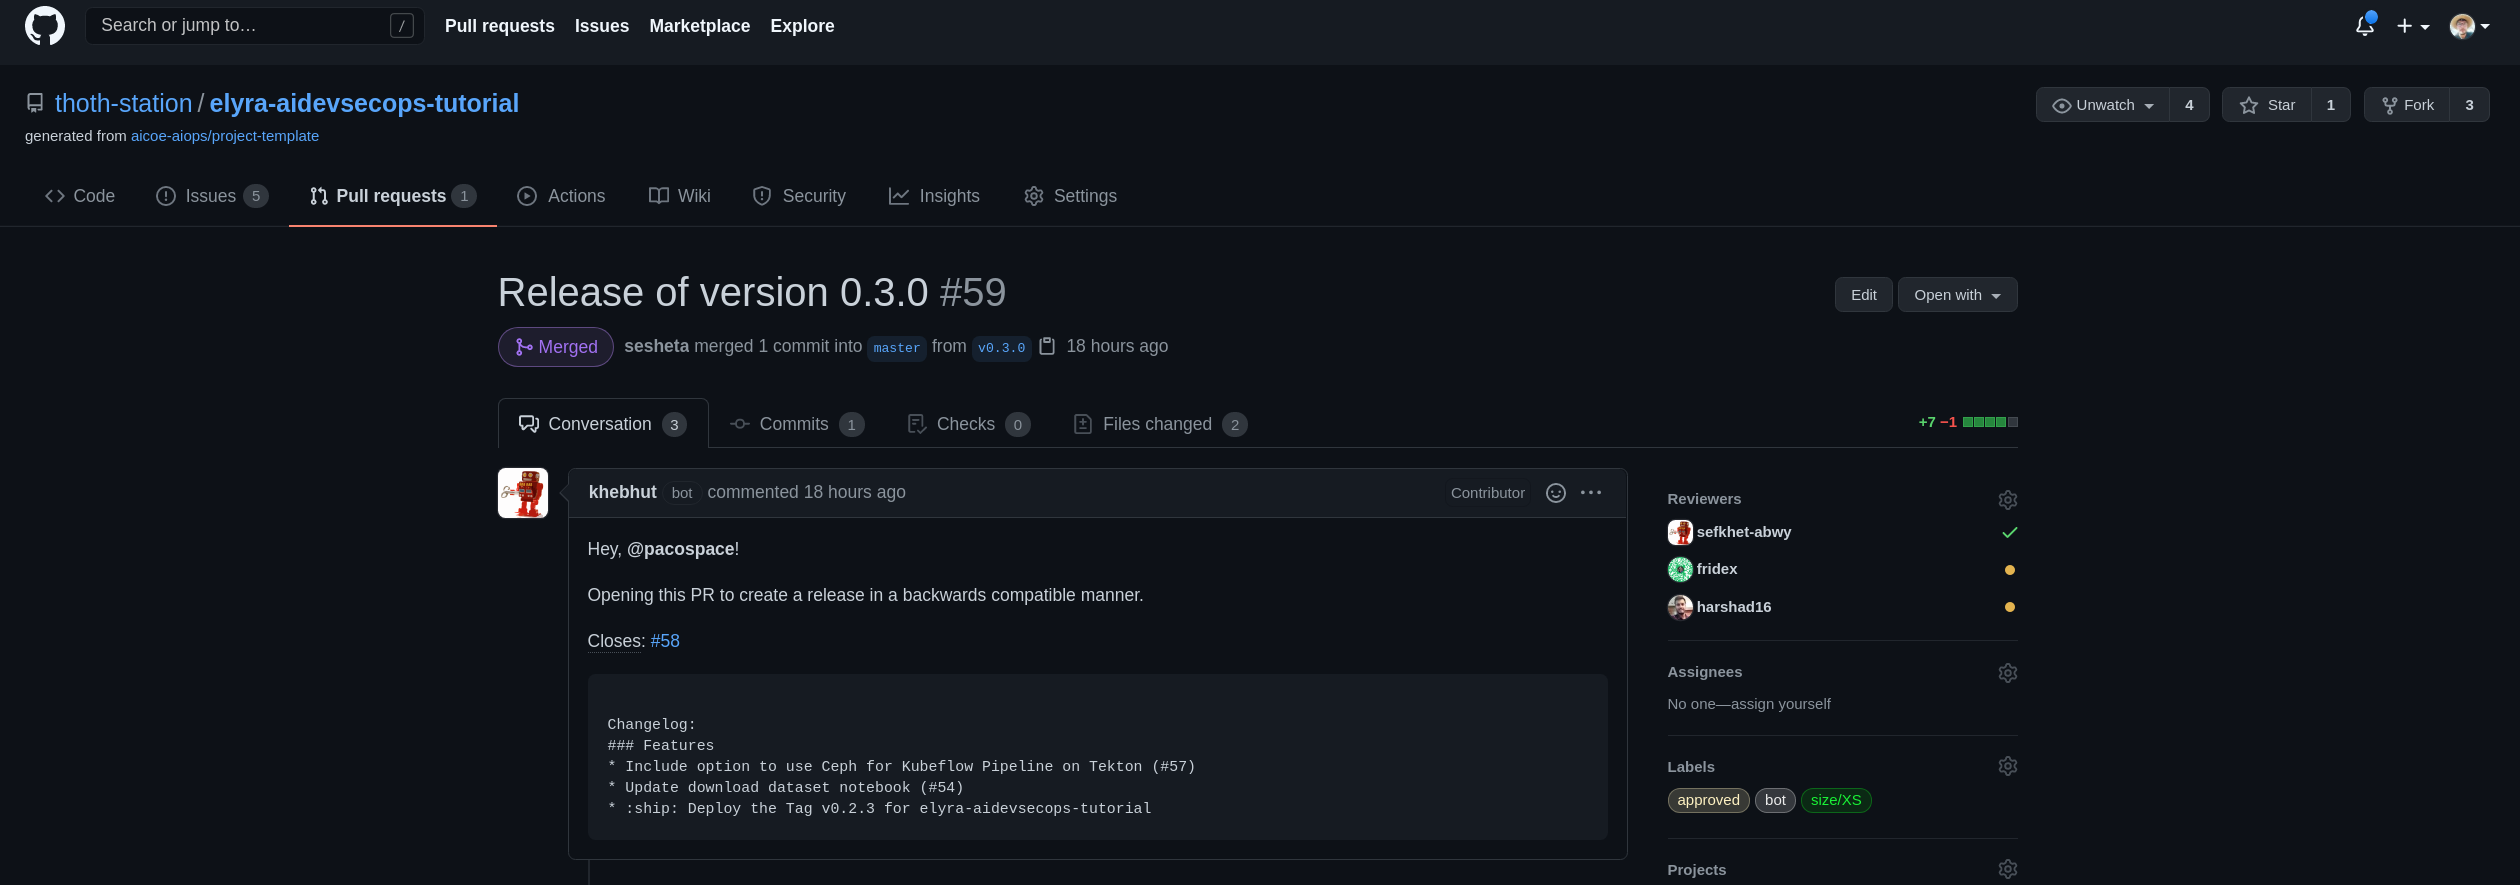
Fun fact, the CHANGELOG in the release is also created using an AI model that clusters pull requests. You can find more information about this model in our glyph project.
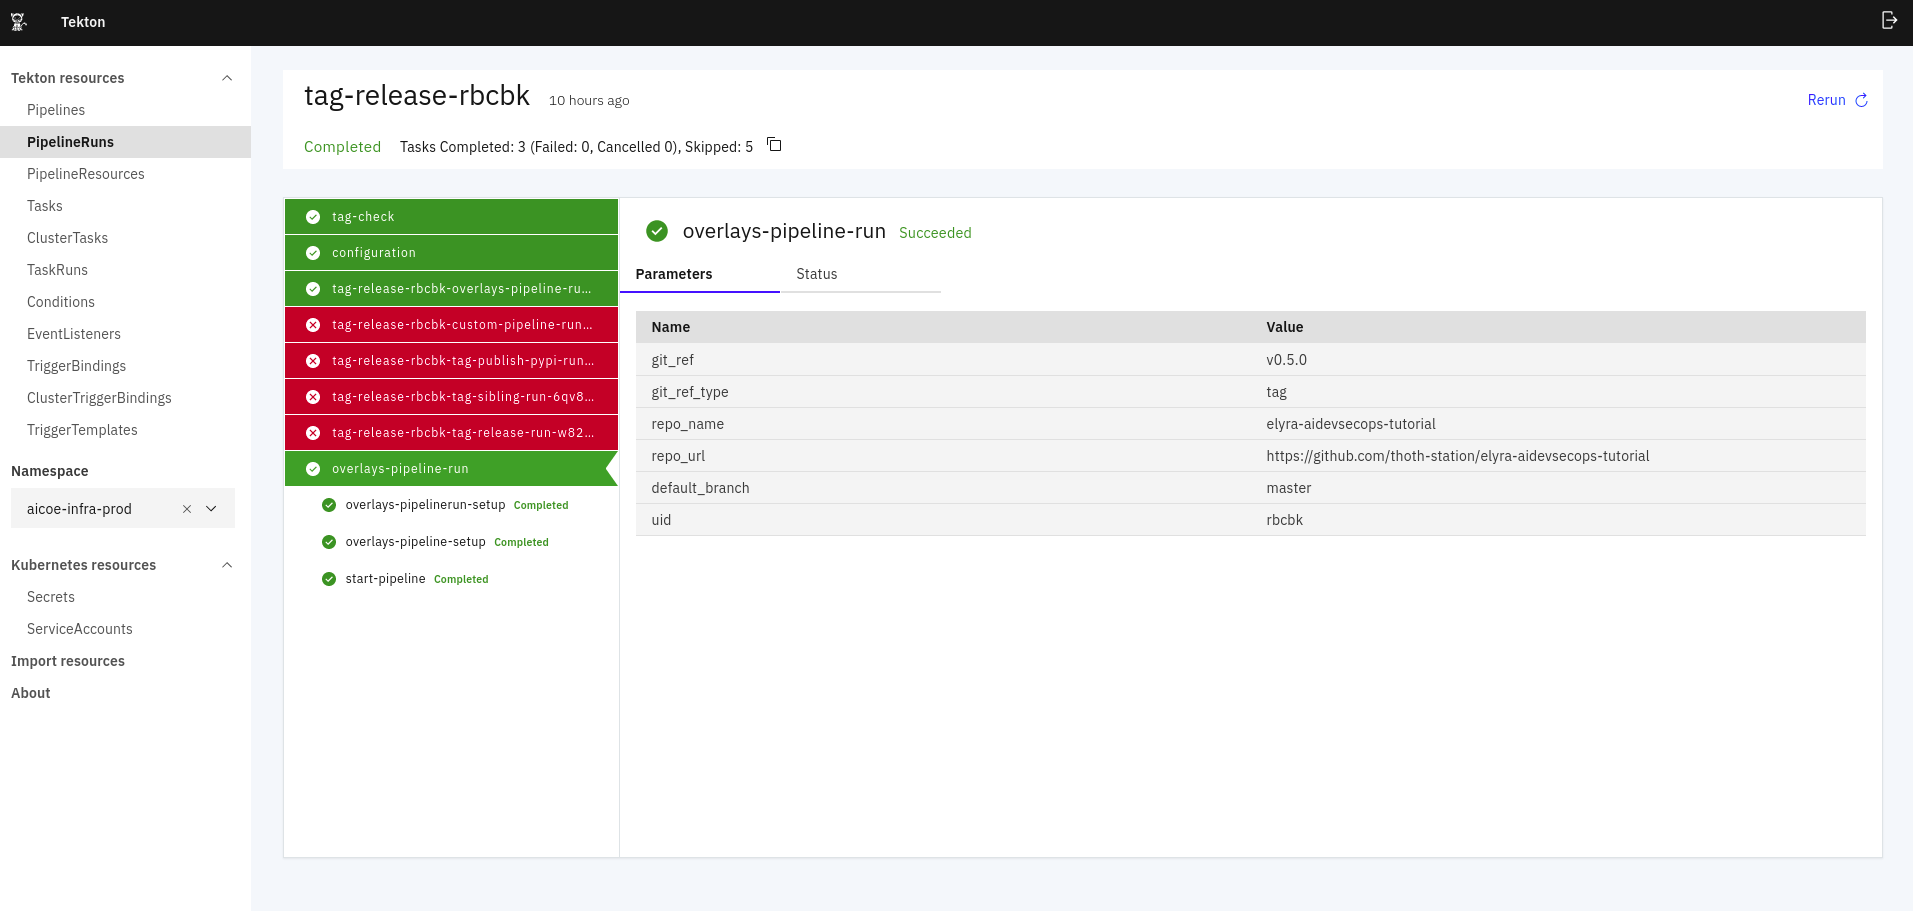
Once the issue is closed by the bot, a new tag is created in the GitHub repo. This in turn triggers the Tekton pipelines in AICoE CI to start the build process and push the image on the registry according to the configuration defined in the .aicoe-ci.yaml.
In this case, the .aicoe-ci.yaml has been populated with all information (e.g. base image, build strategy, registry where to push) related to building the image for the Elyra AIDevSecOps tutorial. To learn more about the configuration options available for the .aicoe-ci.yaml, please check out the AICoE CI documentation.
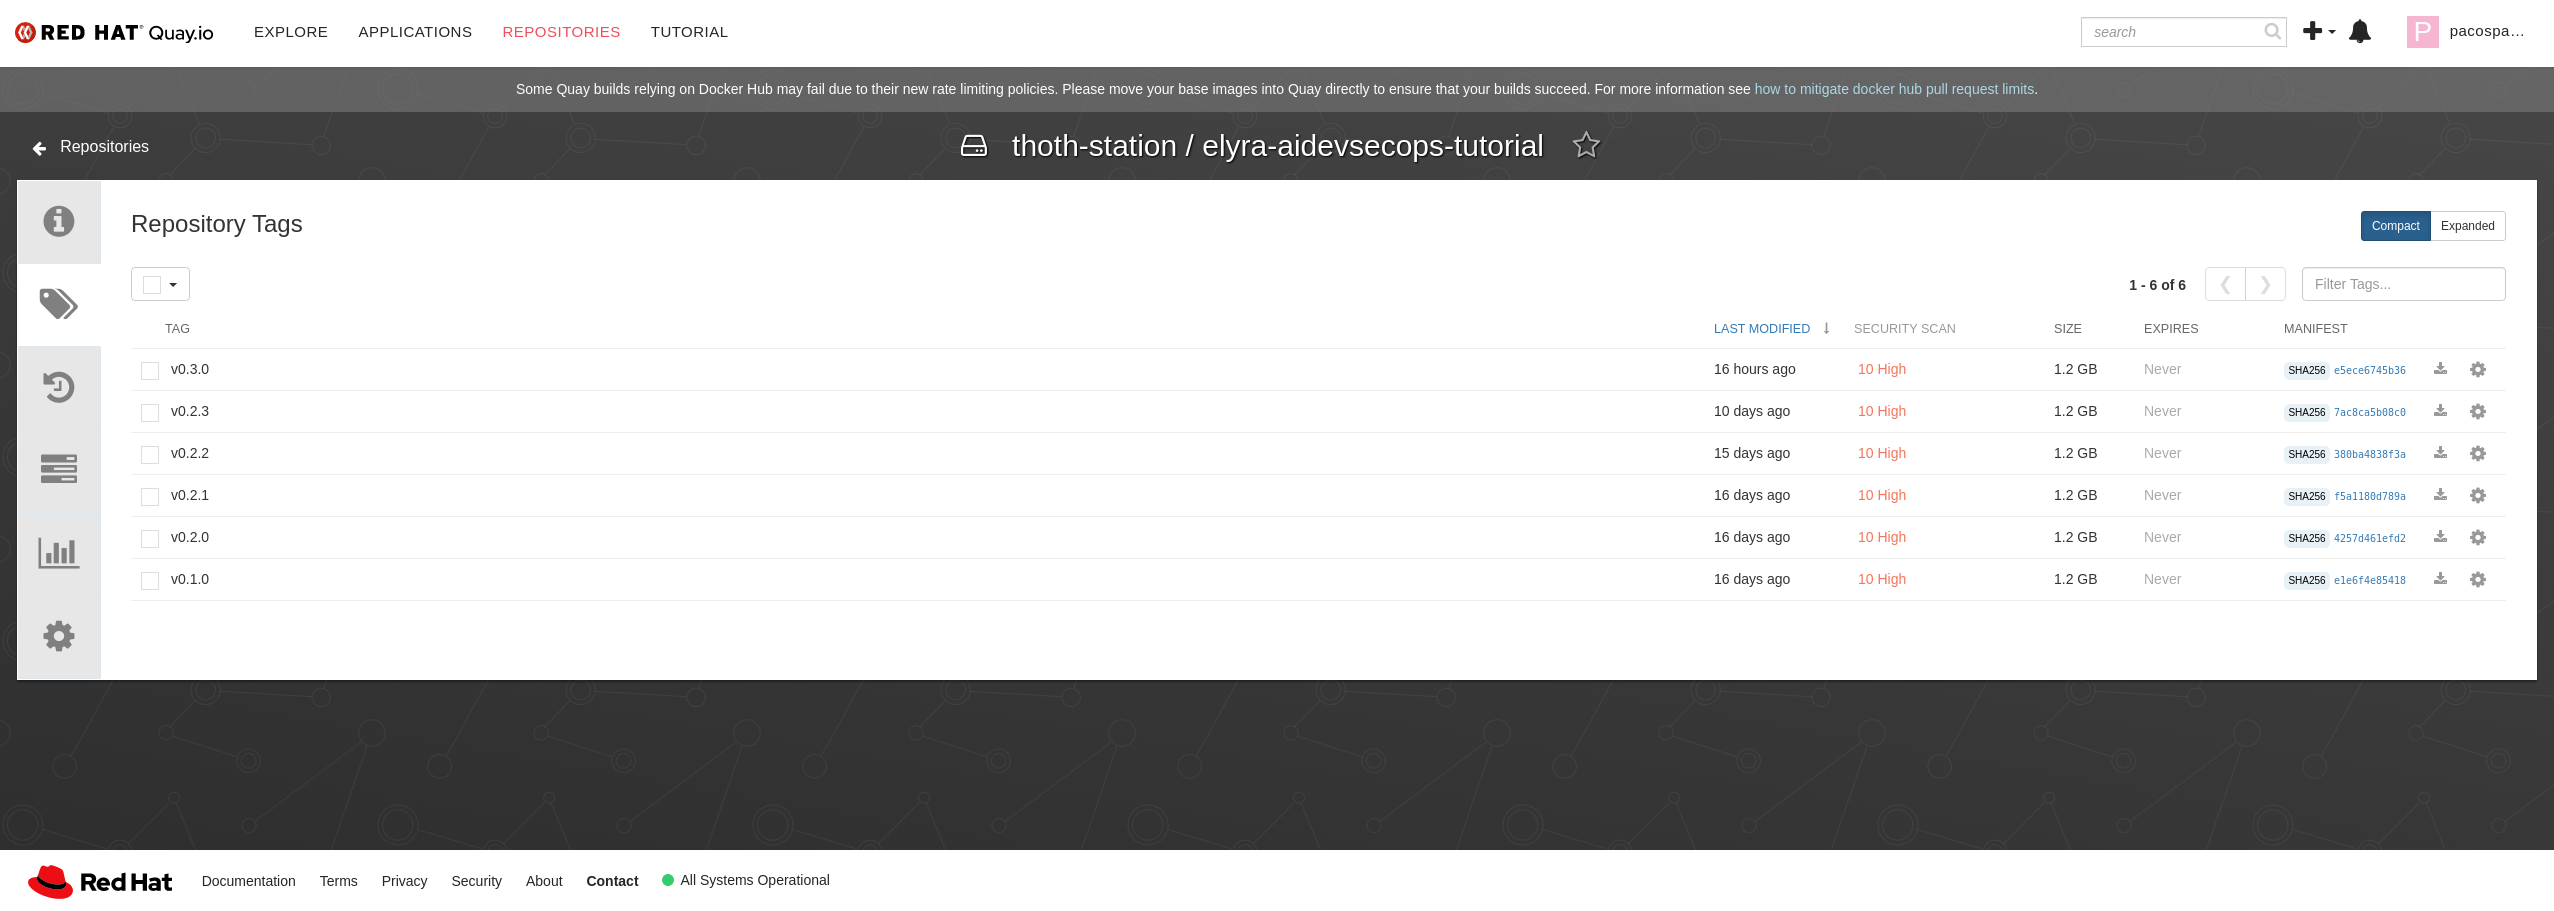
Image available on quay
Once the image has been created by the Tekton pipelines, you can find it in your registry (e.g. Quay):
Use of Overlays
If you have an overlays directory present in your repo, like this tutorial does, you can perform overlays builds using the AICoE Pipeline. This allows you to create different images optimized for the different steps in your AI pipeline. To see how the overlays build requirement can be set up, please check out the .aicoe.yaml config file in this project. Based on this configuration, the AICoE tooling would create as many images as the number of overlays, as you can see from the following images:
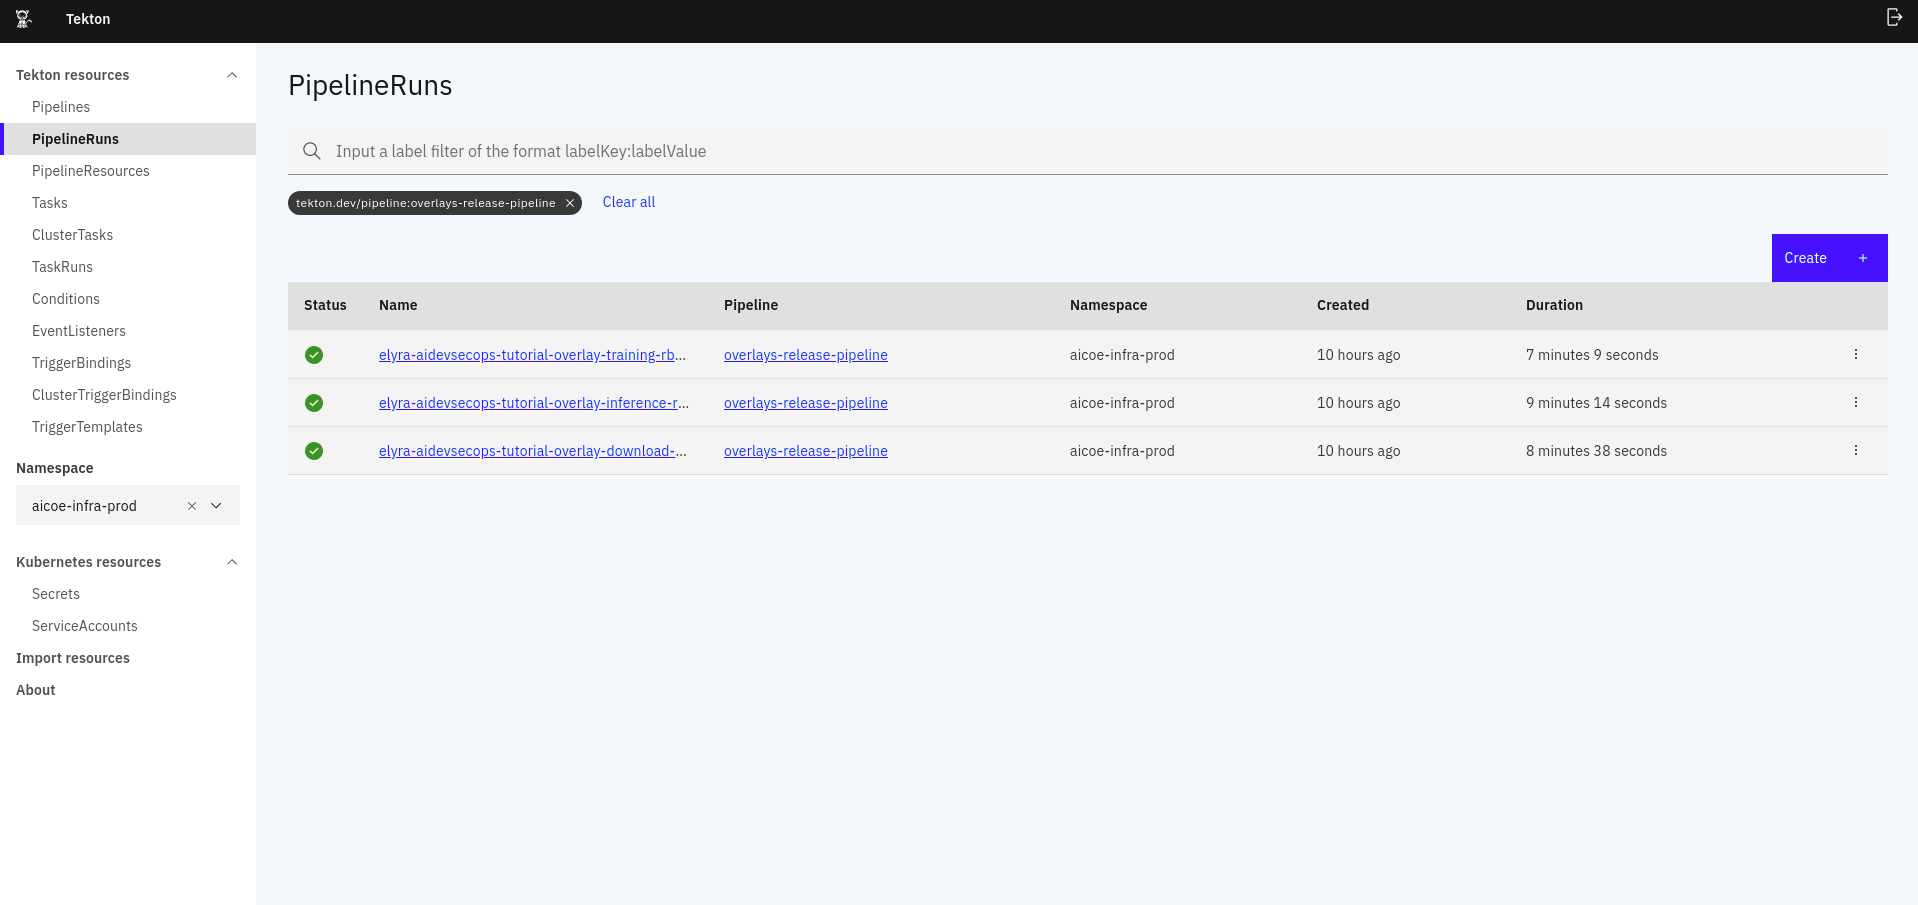
Note that all the requirements for the overlay are created using the Thoth resolution engine. You can find the inputs used for Thoth recommender in the .thoth.yaml config file.
Once the pipelines have finished execution, the images will be available on quay.
Images for MNIST Classification with Tensorflow
You can find the images built for this tutorial at the links provided below. Note that these images have been named according to the overlays requested.
- download-dataset overlay -> quay.io/thoth-station/elyra-aidevsecops-dataset:v0.11.0 (download-dataset image)
- training overlay -> quay.io/thoth-station/elyra-aidevsecops-training:v0.11.0 (training image)
- inference overlay -> quay.io/thoth-station/elyra-aidevsecops-tutorial:v0.11.0 (inference image)
Images for MNIST Classification with Pytorch and Neural Magic
You can find the images built for this tutorial at the links provided below. Note that these images have been named according to the overlays requested.
- nm-download overlay -> quay.io/thoth-station/neural-magic-download:v0.13.0 (download-dataset image)
- pytorch-training overlay -> quay.io/thoth-station/pytorch-training:v0.13.0 (training image)
- nm-convert-onnx overlay -> quay.io/thoth-station/neural-magic-convert-onnx:v0.13.0 (convert-to-onnx image)
- nm-sparseml overlay -> quay.io/thoth-station/neural-magic-sparseml:v0.13.0 (sparsify image)
- nm-inference overlay -> quay.io/thoth-station/neural-magic-deepsparse:v0.13.0 (inference image)
Dependencies updates in the repo
Once you install Khebut in your repo, you can benefit from different services just setting correctly the configuration file.
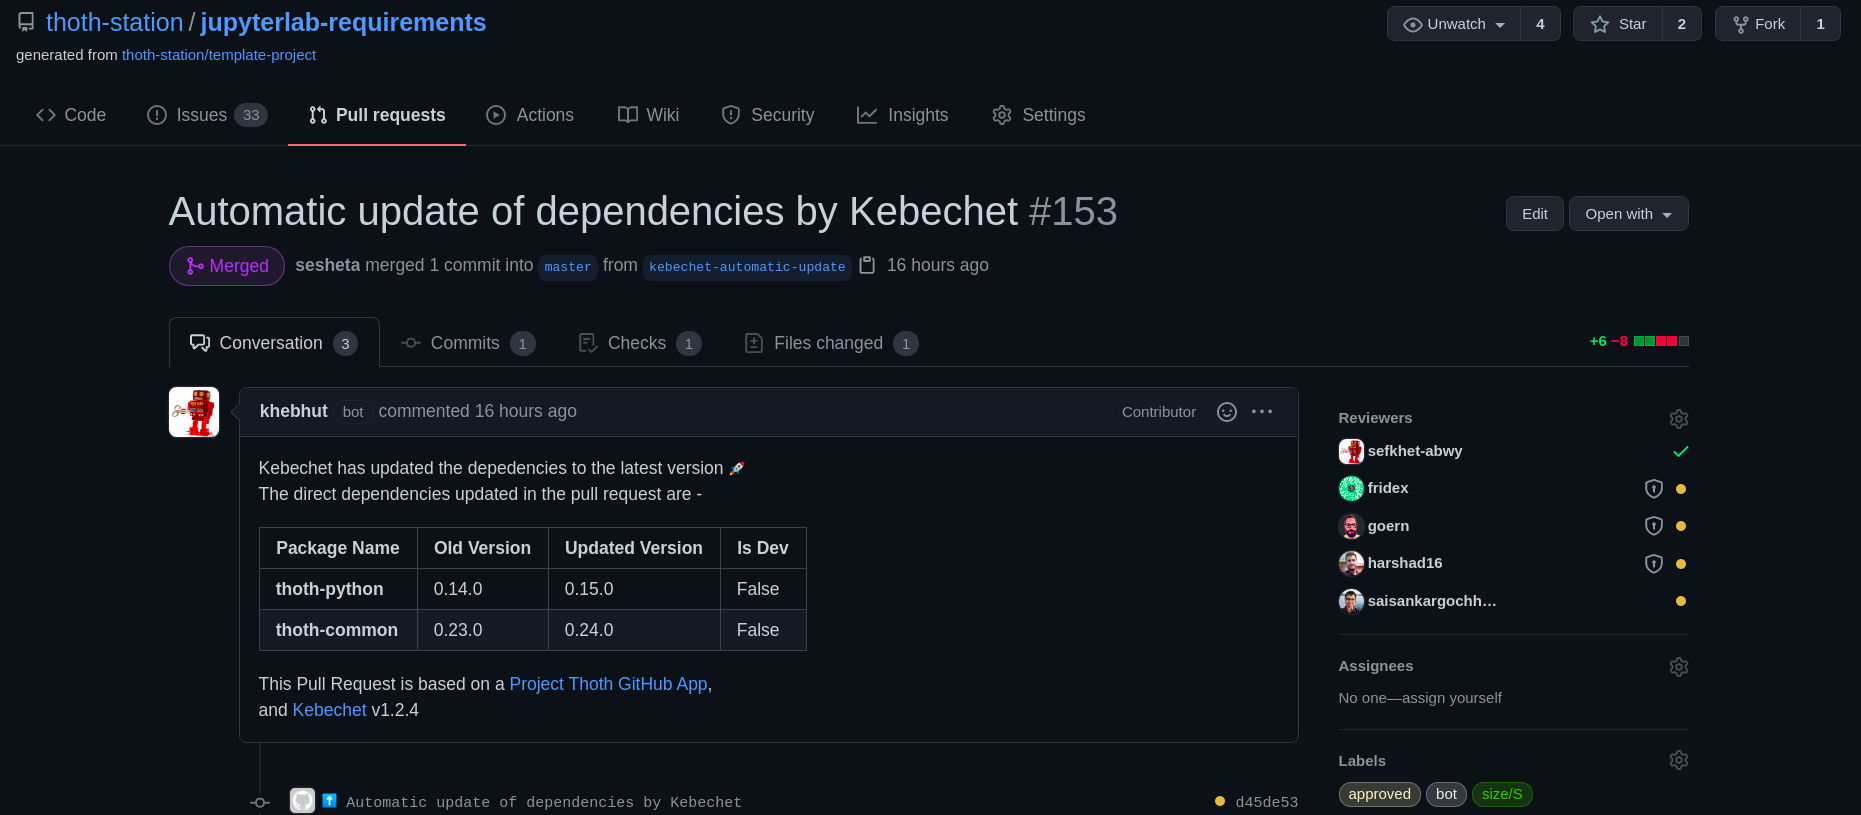
Thoth bots regularly checks if your project is using the optimal set of dependencies in terms of CVE vulnerabilities, newer package releases, and performance changes. If it finds that the dependencies can be updated, it automatically opens a PR on your repo to make the required updates!
An example of the Khebut bot in action can be seen below.
Next Steps
As mentioned before, we have different versions for the MNIST application (you can just pick one and go ahead).